Stop immediately
Stop if you feel sharp pain, numbness, tingling, dizziness, joint pain, shortness of breath, or symptoms that feel wrong.
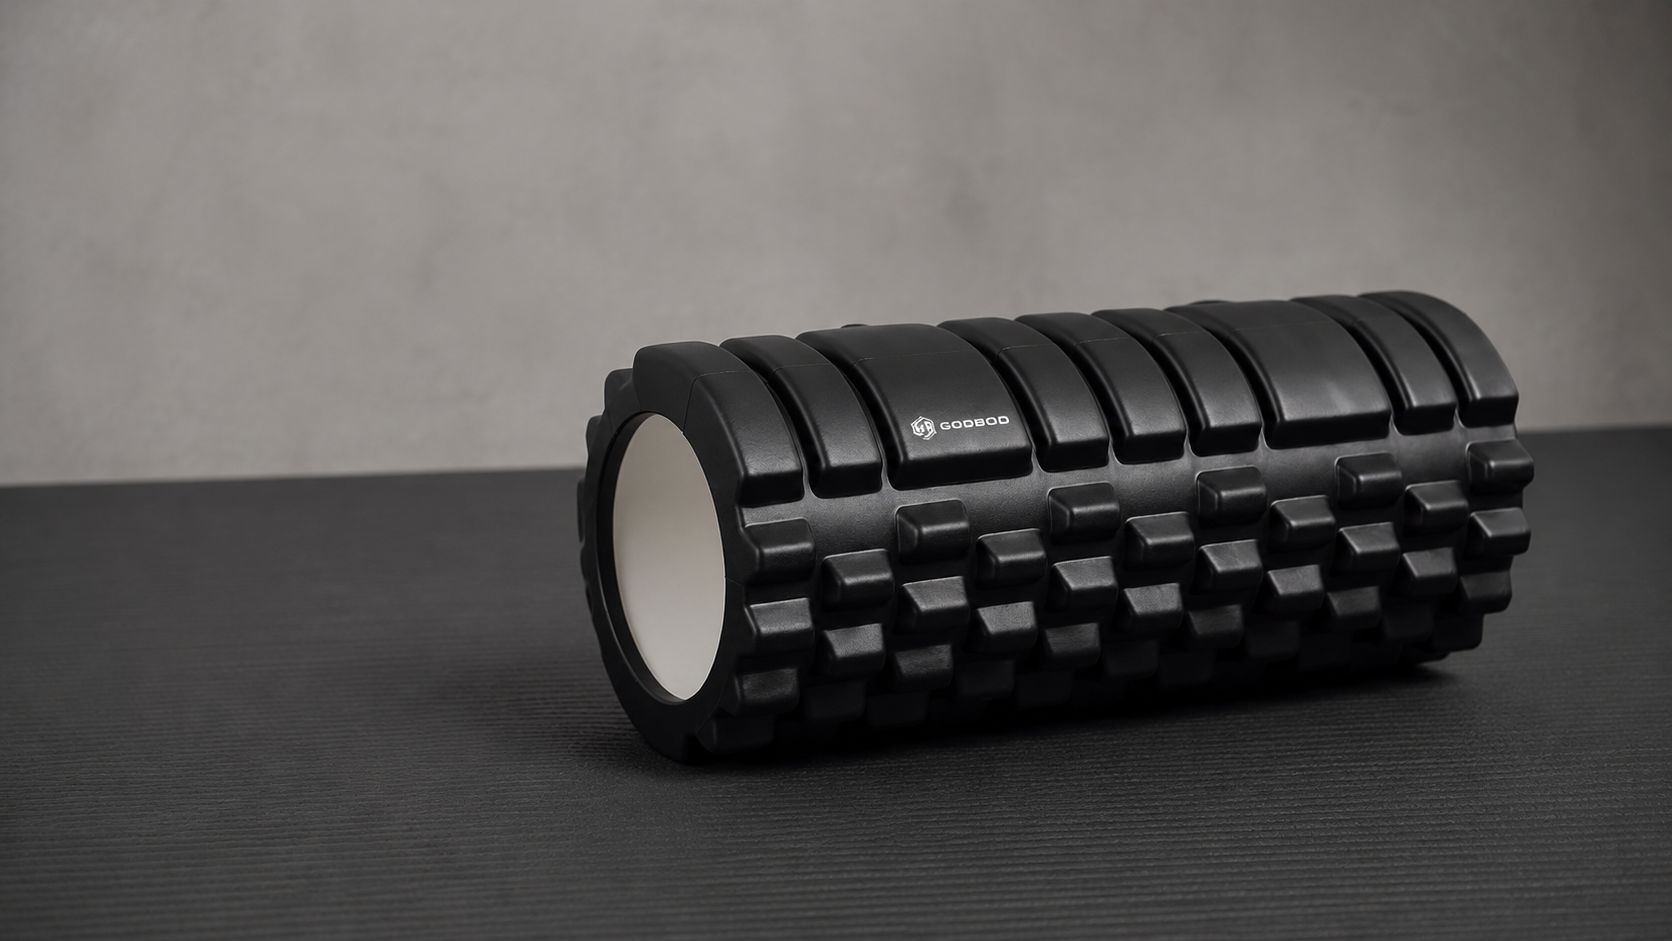
GODBOD manual / Drop 001 / GDBD-FM1
Thirteen recovery techniques, pressure-zone selection, quick routines, safety notes, care, and a PDF-ready quick-reference sheet for the GODBOD GDBD-FM1 roller.
01 / Contents
02 / Welcome
The GDBD-FM1 is a compact textured roller for warm-ups, cooldowns, and daily mobility resets. This manual is built to help you choose the right pressure zone, set up safely, and repeat short routines without guessing.
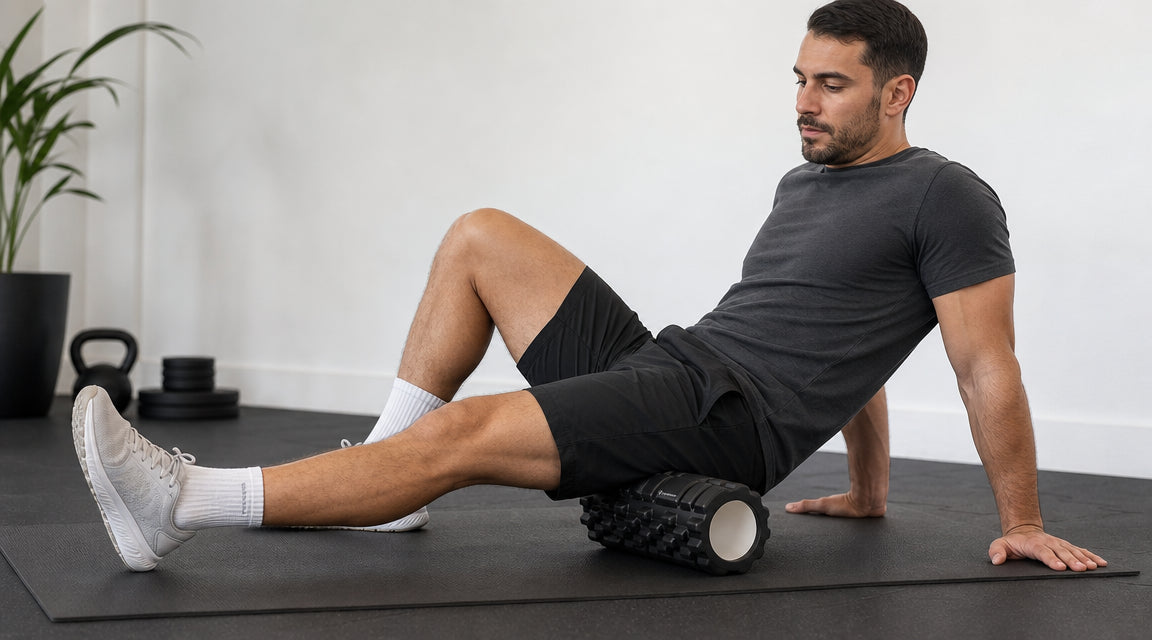
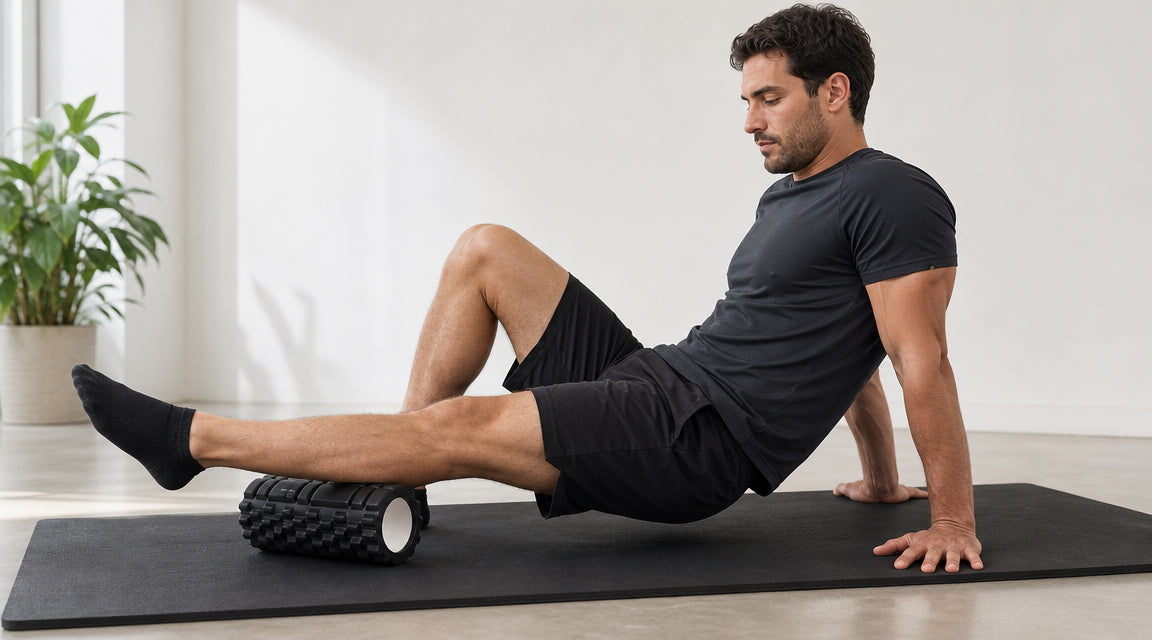
Start light. Roll slowly. Keep breathing. If a position feels sharp, numb, unstable, or wrong, stop and change the setup.
Pick two lower-body areas and one upper-back area. Spend 20 to 45 seconds per area, then walk around and reassess.
03 / Before you roll
Stop if you feel sharp pain, numbness, tingling, dizziness, joint pain, shortness of breath, or symptoms that feel wrong.
Avoid direct pressure on joints, bones, the neck, the low spine, wounds, rashes, bruising, swelling, and recent surgical areas.
Ask a qualified healthcare professional before use if you are injured, pregnant, recently had surgery, or have a medical condition.
04 / Frequently asked questions
Foam rolling is a self-massage habit used to apply controlled pressure to soft tissue before training, after training, or after long periods of sitting.
Use lighter passes before training and slower, calmer passes after training. On rest days, keep sessions short and focused.
Start with 20 to 45 seconds per area or about 8 to 10 slow passes. Pause gently for a few breaths if a spot feels useful.
It can feel uncomfortable, but it should stay manageable. Reduce pressure if you tense up or hold your breath.
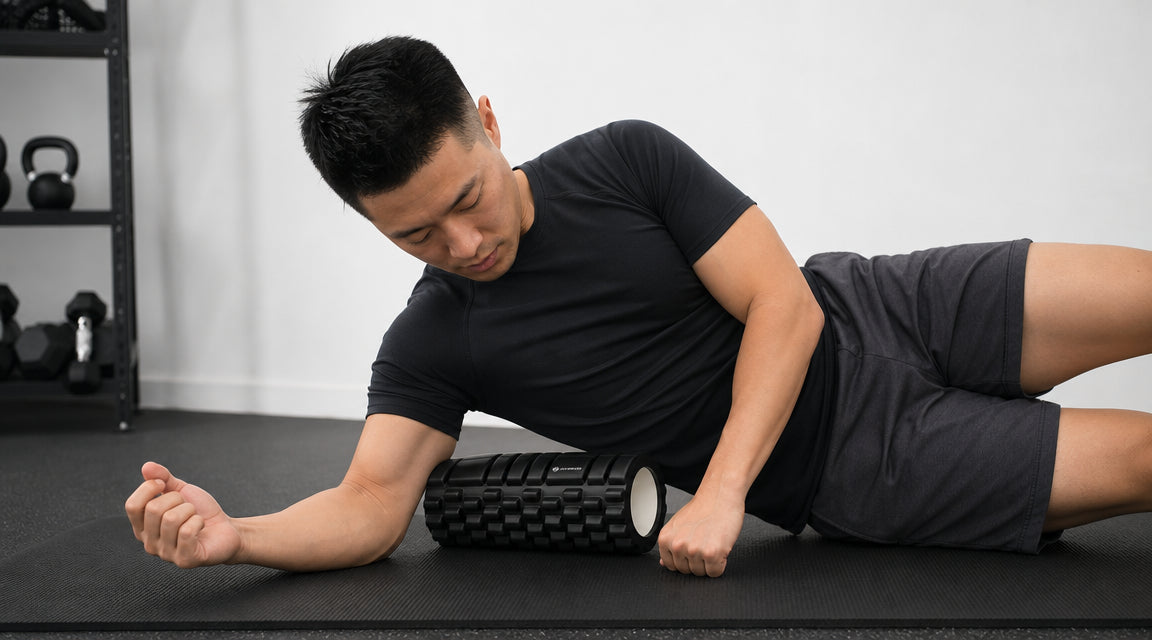
Use your hands and opposite leg to unload body weight, choose broad pads, and shorten the session.
Change body angle first. Add pressure slowly. Use edge blocks or focus nubs only when pressure feels useful.
05 / Roller anatomy
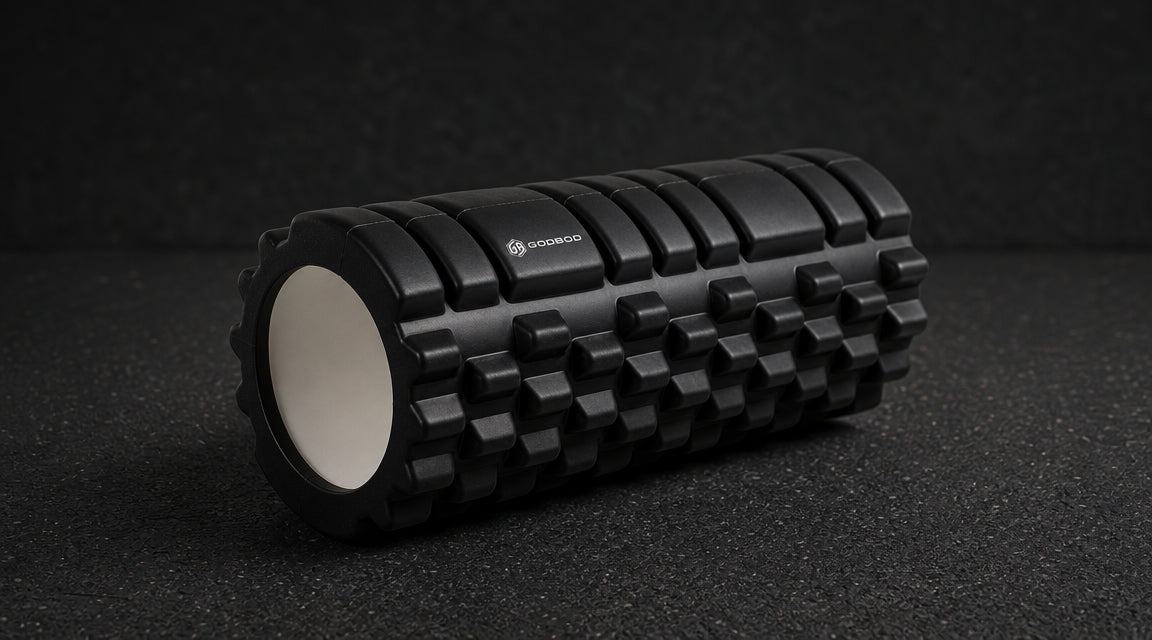 A
B
C
D
A
B
C
D
06 / Quick routines
07-19 / Technique index
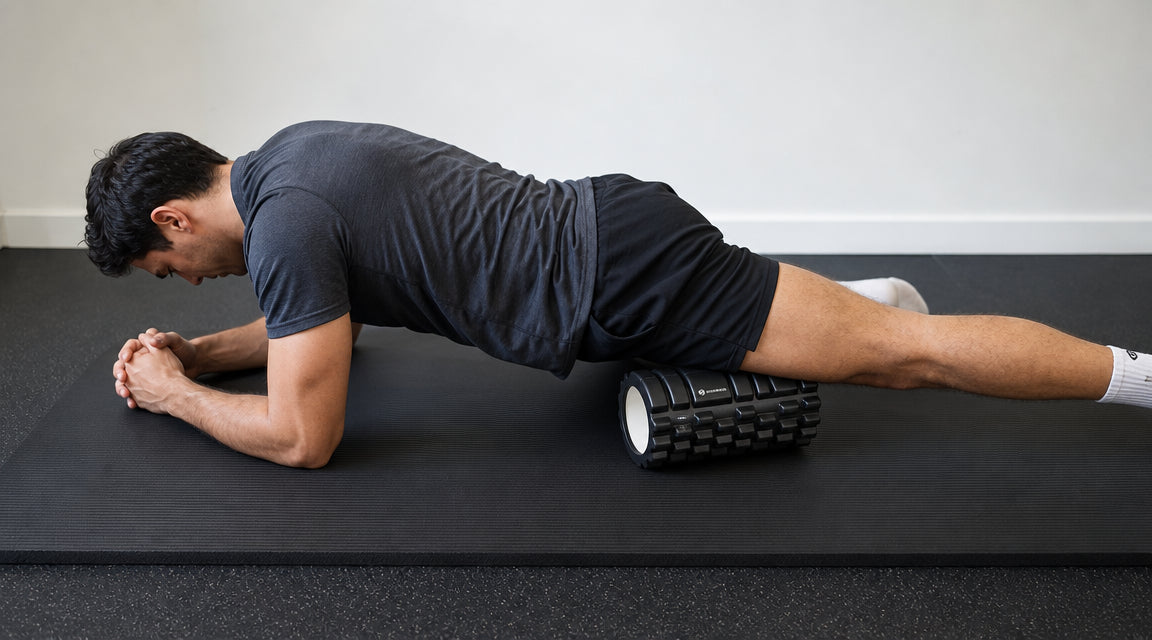
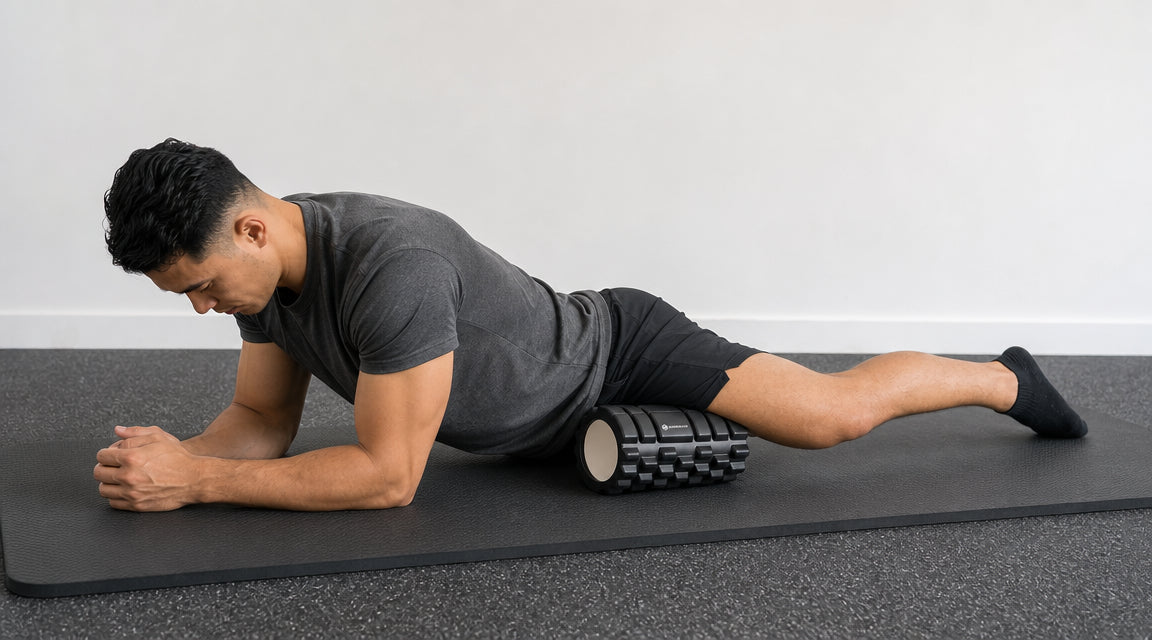
07 / Hamstrings
Target: hamstrings between the knee and glute.
Avoid: rolling directly behind the knee or forcing pain.
08 / Calves
Target: calf tissue between ankle and knee.
Avoid: direct pressure on the ankle, knee, or Achilles tendon.
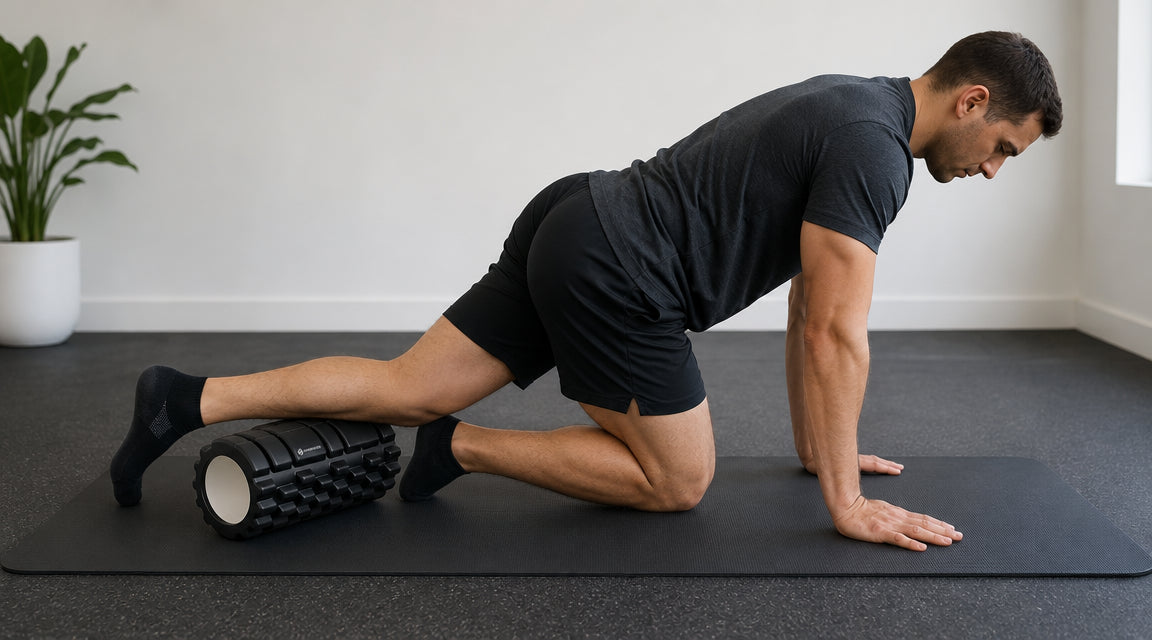
09 / Quads
Target: front thigh between hip and kneecap.
Avoid: rolling directly over the kneecap or arching the low back.
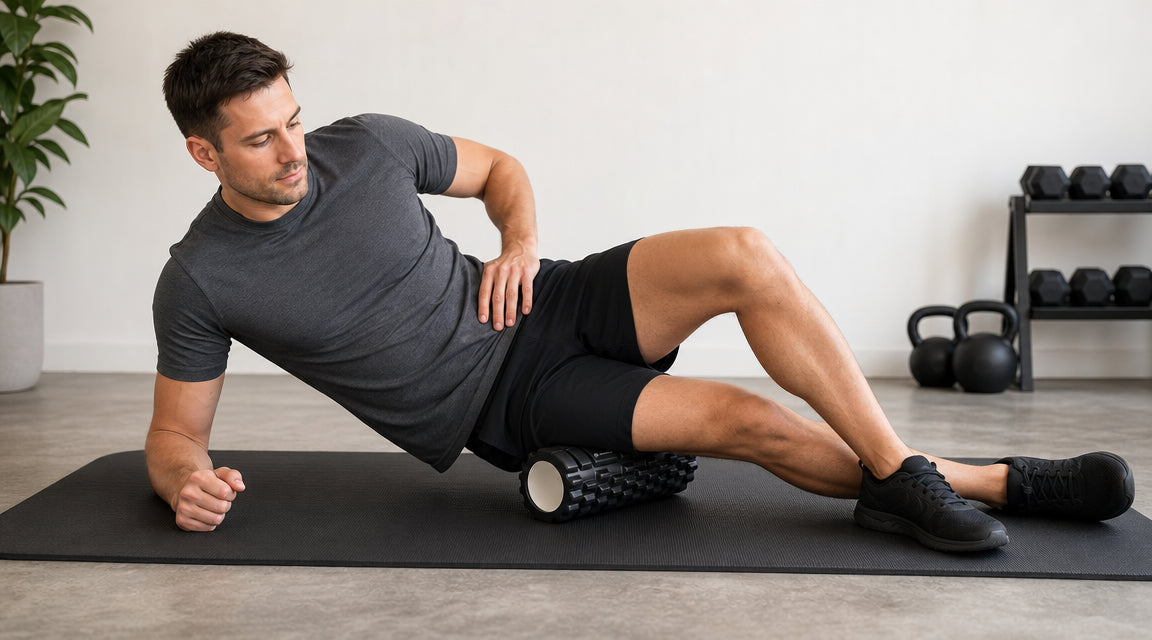
10 / Glutes
Target: glute tissue around the side/back of the hip.
Avoid: direct pressure on the tailbone or hip joint.
11 / Shins
Target: soft tissue along the front outside of the lower leg.
Avoid: rolling directly on the shin bone.
12 / Adductors
Target: inner thigh between groin and knee.
Avoid: rolling directly on the groin or knee joint.
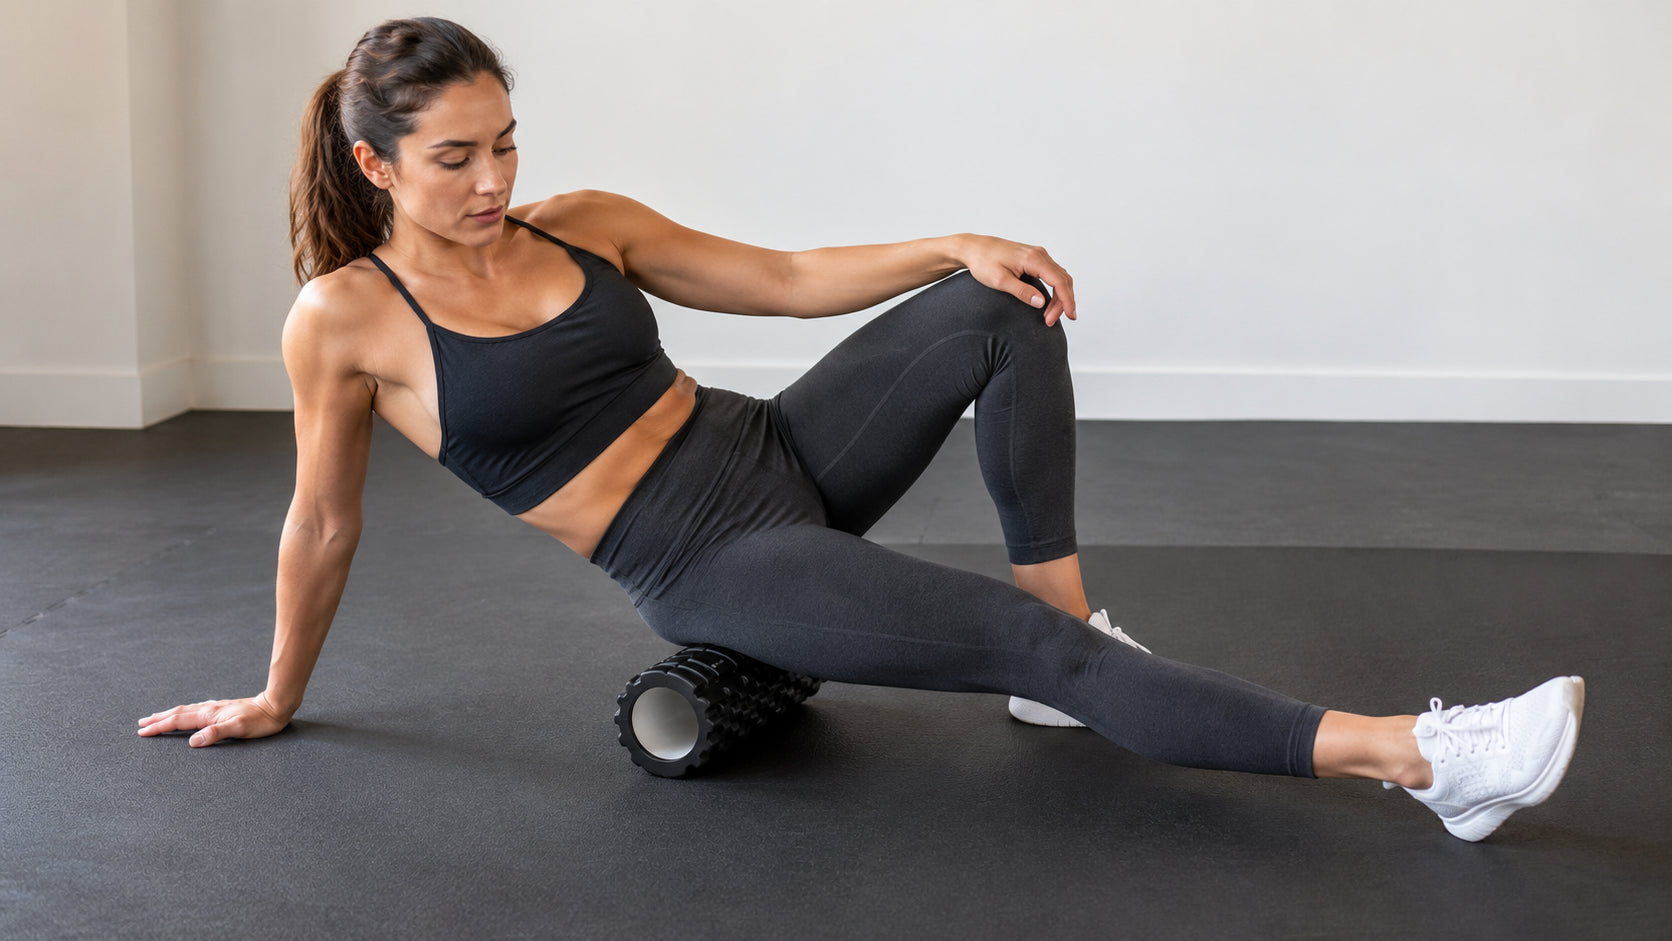
13 / IT band area
Target: outer thigh area with reduced pressure.
Avoid: forcing high pressure through the outside knee or hip.
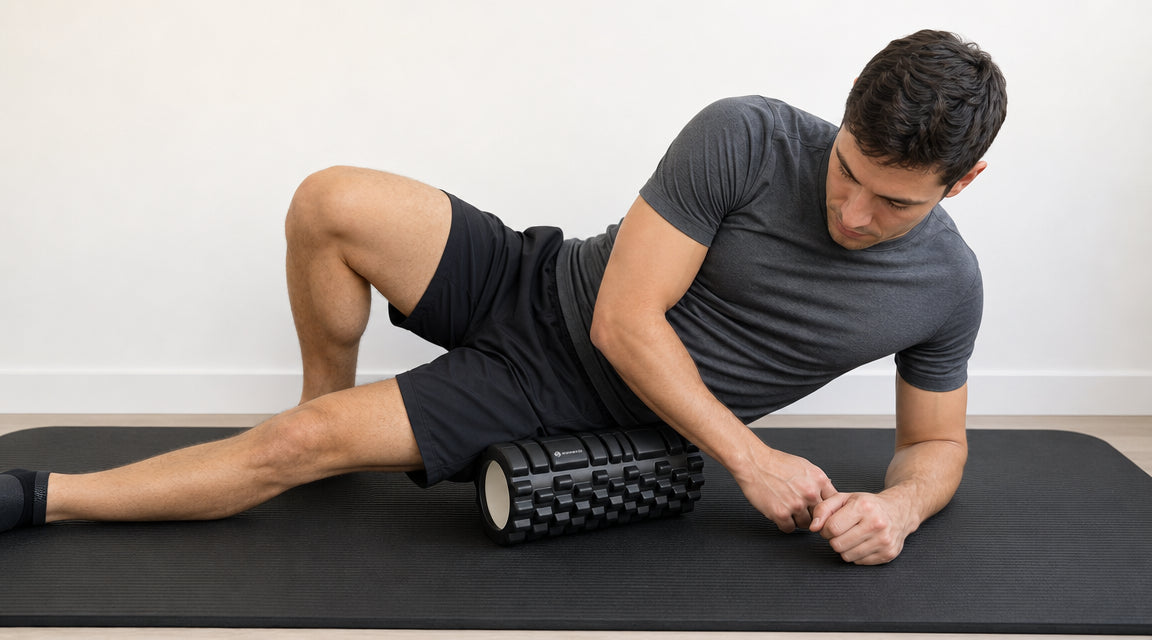
14 / TFL
Target: front outside hip area.
Avoid: direct pressure on the hip bone.

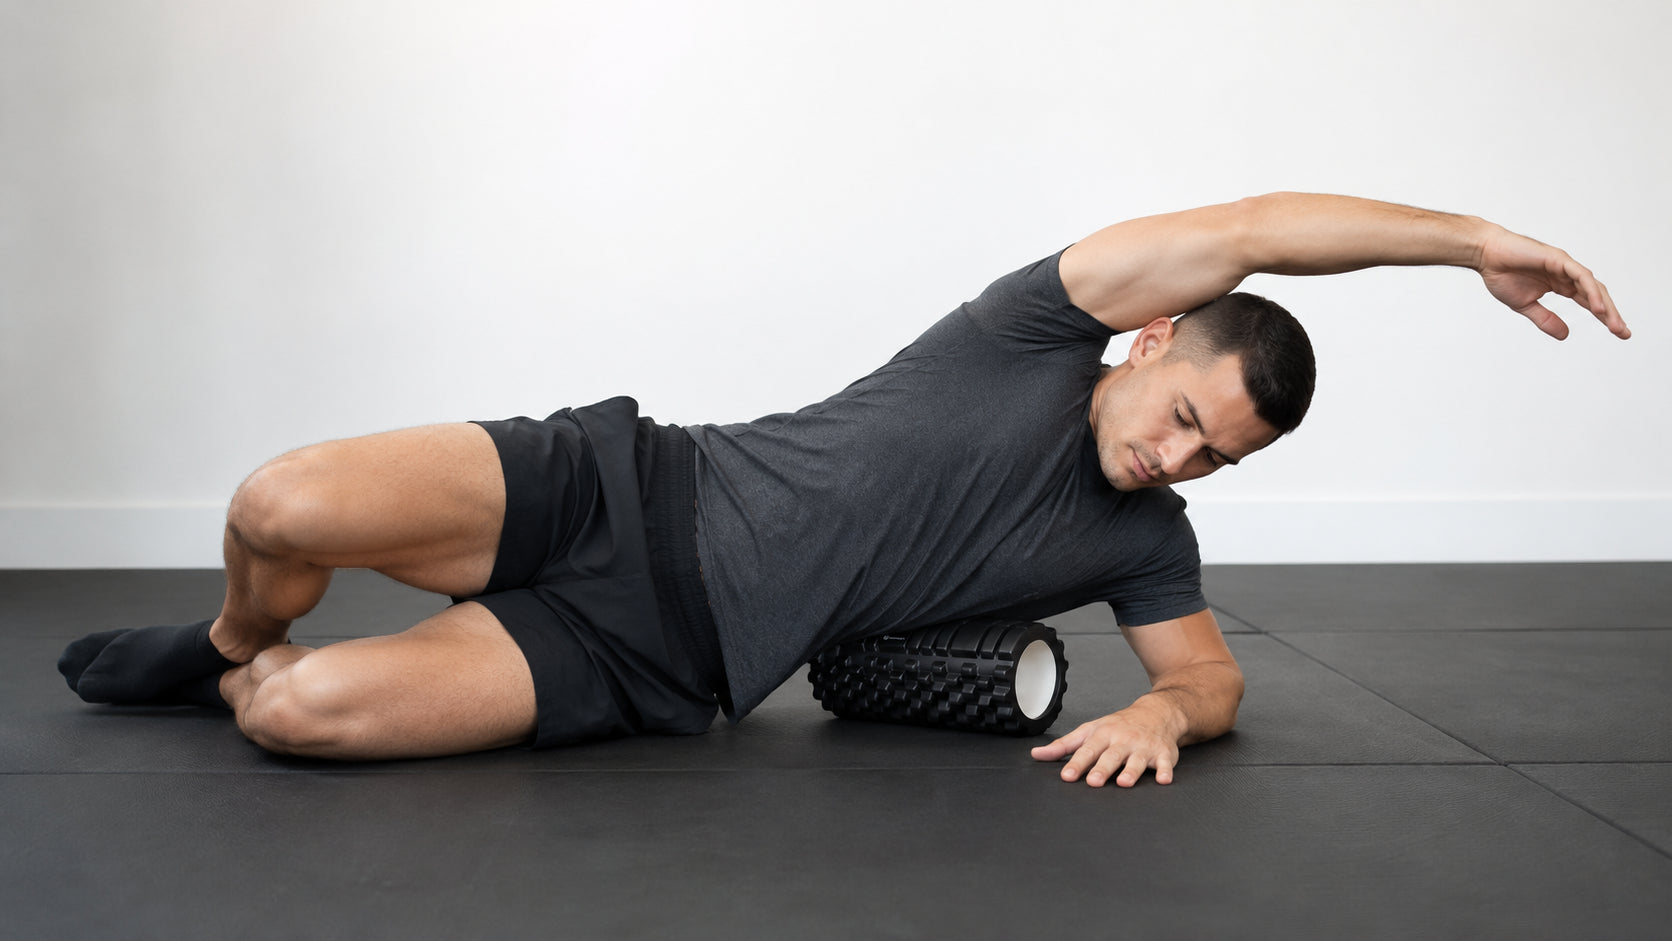
15 / Upper back
Target: upper thoracic back below the neck.
Avoid: rolling the neck or low spine.
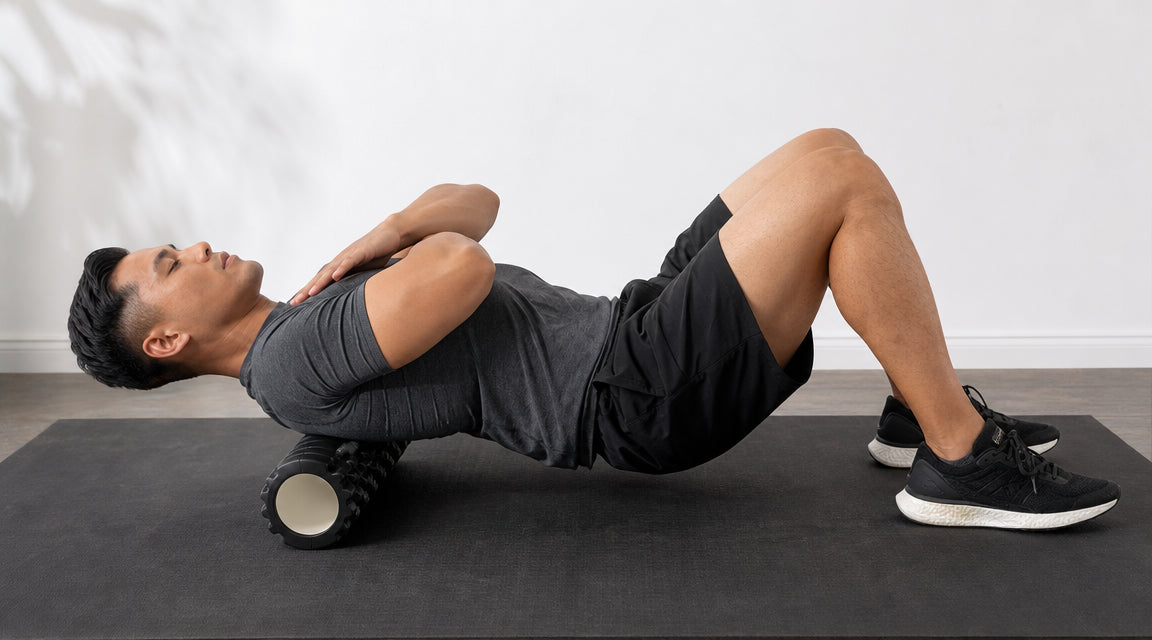
16 / Mid-back
Target: mid thoracic back.
Avoid: rolling into the low back.
17 / Lats
Target: outside rib area below the armpit.
Avoid: forcing pressure into the armpit or rib cage.
18 / Biceps
Target: upper arm biceps area with very light pressure.
Avoid: heavy pressure near the elbow or shoulder joint.
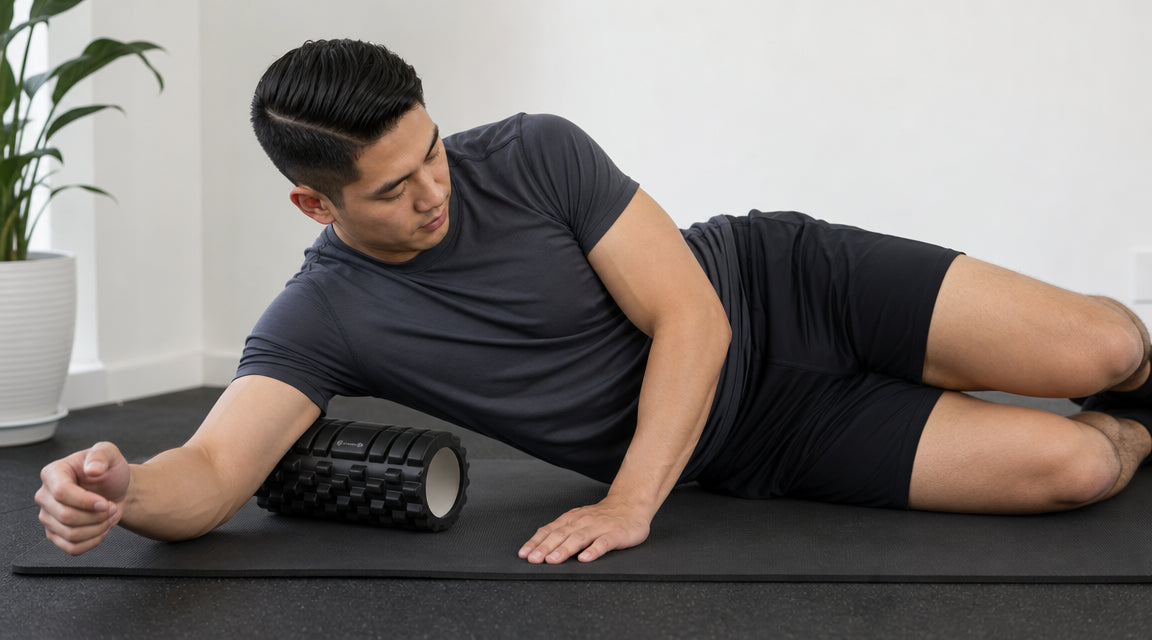
19 / Triceps
Target: back of the upper arm.
Avoid: direct pressure on the elbow or shoulder joint.
20 / Quick reference sheet
Hamstrings, calves, quads, glutes, shins, adductors, IT band area, TFL.
Upper back, mid-back, lats, biceps, triceps.
20 to 45 seconds per area or about 8 to 10 slow passes. Keep breathing steady.
Hands and opposite leg reduce load. Crossed legs and sharper tread zones increase load.
Sharp pain, numbness, tingling, dizziness, shortness of breath, joint pain, or symptoms that feel wrong.
Pick one short routine and repeat it consistently before adding more drills.
21 / Care and progression
Wipe the roller after use and let it dry before storage. Avoid sharp objects and high heat.
Start with broad zones and shorter sessions. Use edge blocks or focus nubs only when the pressure feels useful.
Mild discomfort can be normal. Sharp pain is not a goal. Stop and reassess.
22 / Keep building
Use this guide as a starting point. Keep sessions short, repeat the routines that help, and come back to the technique pages when training demands change.
Textured hollow-core foam roller for warm-ups, cooldowns, and daily mobility breaks.
Use useful pressure, breathe normally, avoid joints and bones, and stop if symptoms feel sharp or wrong.
Visit trygodbod.com for product details, support, and the latest guide updates.